Tag: defensive driving

  • Sunday Sign Day: Two-Way Traffic (What It Means and How to Drive It Confidently)

    Sunday Sign Day: Two-Way Traffic (What It Means and How to Drive It Confidently)

    Share this:

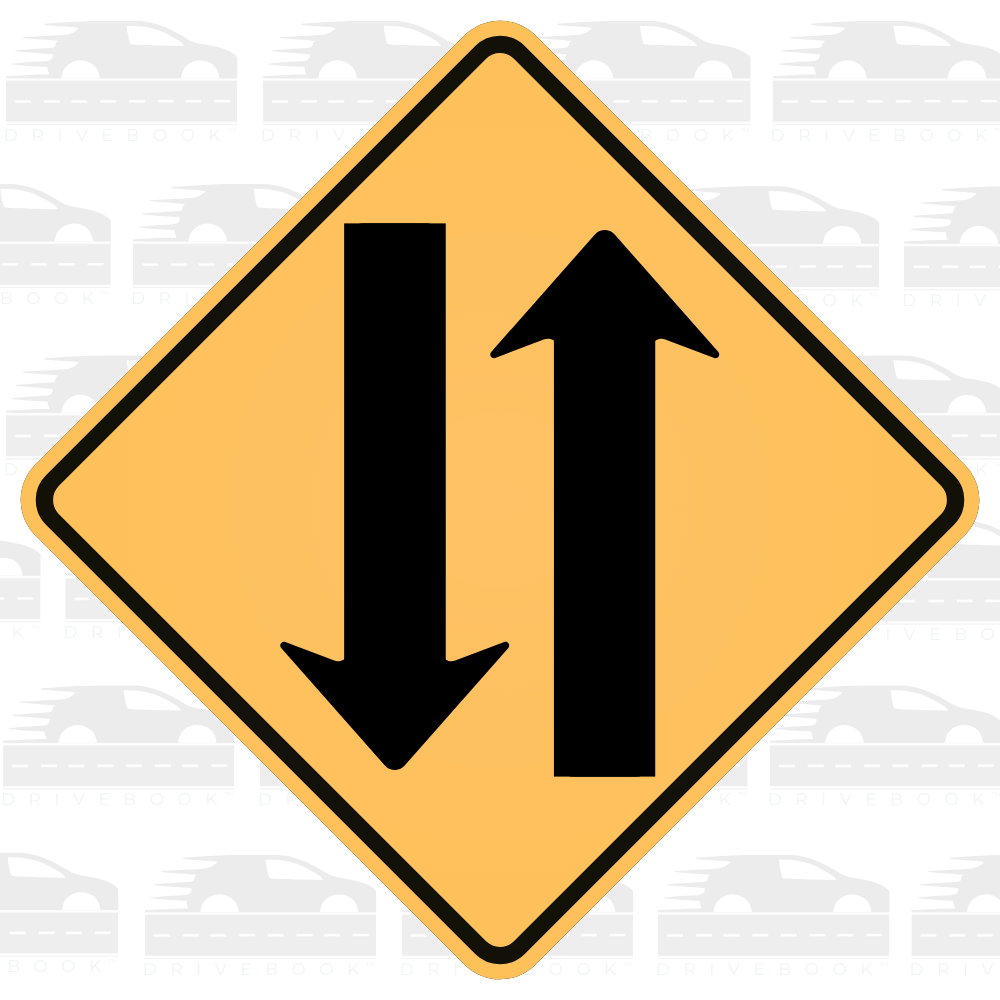
    The Two-Way Traffic sign is a warning sign that tells you something important is about to change:
    traffic will now be moving in both directions.

    You’ll usually see this sign when a road shifts from one-way to two-way, when a divided highway ends, or when a median disappears. It’s not there to catch you off guard — it’s there to give you time to adjust.

    When a road becomes two-way, the environment changes in a subtle but important way. You’re no longer just moving with traffic — you’re now sharing the road with vehicles coming toward you.

    That shift requires a different kind of awareness.

    Instead of only focusing forward, you need to:

    • Stay clearly centered in your lane
    • Be aware of oncoming traffic at all times
    • Adjust your spacing, especially on narrower roads
    • Stay alert on curves, hills, or areas with limited visibility

    This is especially important at night or in poor weather, when it’s harder to judge distance or see lane markings clearly. A road that felt simple a moment ago can feel tighter once traffic is moving in both directions.

    That doesn’t mean it’s harder — it just means your awareness needs to shift.

    The Two-Way Traffic sign is there to help you make that shift early, so nothing about the change feels sudden or stressful.


    Why This Sign Matters

    New drivers often feel uneasy when road patterns change unexpectedly. But this sign removes that uncertainty.

    It’s not about memorizing what to do — it’s about understanding what’s happening.

    When you know traffic is now moving both ways, you can:

    • anticipate oncoming vehicles
    • stay positioned correctly
    • and drive more smoothly without hesitation

    💡 Drivebook Tip:
    When you see a Two-Way Traffic sign, take a second to reset your awareness. Check your lane position, scan ahead, and stay centered. Small adjustments early make driving feel easier — and more controlled.


    Final Thought

    Driving becomes easier when changes don’t feel like surprises.

    The Two-Way Traffic sign is a simple reminder:
    pay attention, adjust early, and keep your awareness wide — not just forward.

    That’s how confident drivers stay in control.

    Share this:
  • Sunday Sign Day: Deer Crossing

    Sunday Sign Day: Deer Crossing

    Share this:

    In many areas, spring is an especially important time to take Deer Crossing signs seriously. As temperatures warm up, deer movement increases — they’re more active at dawn and dusk, may travel more after winter, and roadside greenery can make them harder to spot until they’re close.

    You don’t need to drive in a tense way. The goal is simply to give yourself a little more time and space so you can respond smoothly.

    The Deer Crossing sign is a warning sign. In plain language, it means: wildlife may enter the roadway here, so it’s smart to slow down a bit and stay alert.

    This sign isn’t a guarantee you’ll see deer — it’s just a heads-up that this stretch of road has a higher chance of wildlife crossings.

    For sign standards and examples, the national reference is the MUTCD (FHWA). Many state driver manuals also explain what to do in wildlife areas (for example, the California DMV Handbook — Special Situations: Animals).


    What the Deer Crossing sign means (and what it doesn’t)

    It means:

    • Deer (and sometimes other animals) may cross unexpectedly
    • The area may be near woods, fields, water, or known wildlife paths
    • You should give yourself more time to react

    It doesn’t mean:

    • Deer will only cross at the sign
    • It’s safe to swerve if you see an animal
    • You should stop in the roadway to look for wildlife

    A calm goal is to keep your options open: more space, a little less speed, and steady attention.


    Why this sign exists

    Wildlife collisions are common enough that higher-risk areas are marked. Deer are most active around dawn and dusk, and they often travel in groups — if you see one, there may be another close behind.

    This sign helps reduce surprise. It reminds drivers to scan the road edges and avoid sudden moves if an animal appears.

    (For broader safety context, the Insurance Institute for Highway Safety has helpful information on animal-related crashes.)


    What to do when you see it

    Here’s a simple, teen-friendly plan:

    1) Ease your speed and increase following distance
    No need to brake hard — just ease off the gas and give yourself more space to respond smoothly.

    2) Scan the edges of the road
    Deer often appear from tree lines or tall grass. Try a steady scan:

    • Far ahead (especially where headlights reach at night)
    • Road edges and shoulders
    • Just beyond the shoulder

    3) Use high beams when appropriate (at night)
    On dark roads without oncoming traffic, high beams help you see farther. Dim them when needed.

    4) If you see a deer, brake firmly and stay in your lane
    This is the most important part:

    • Brake in a straight line
    • Stay in your lane
    • Avoid swerving — it often creates a bigger risk

    If there’s time, a quick horn tap can encourage the animal to move away.


    Common misconceptions teens have

    “The sign shows where deer cross.”
    Think of it as a zone — deer can cross anywhere nearby.

    “Once one deer passes, I’m in the clear.”
    Deer often travel in groups. Keep scanning.

    “Swerving is safer than braking.”
    It can feel faster, but it’s riskier. Straight-line braking keeps you in control and predictable.


    A quick coaching tip (for parents and teen drivers)

    Try a calm callout routine:

    Parent/coach: “Deer Crossing sign — let’s add space and scan the shoulders.”
    Teen: “Easing off the gas and checking left/right edges.”

    It’s simple, but it builds a repeatable habit.


    Closing

    The Deer Crossing sign is a reminder to drive with a little extra margin — more space, steady scanning, and smooth braking if something appears.

    If you’d like a calm, visual way to learn road signs and rules (with explanations you can talk through as a family), visit mydrivebook.com.

    Share this:
  • Sunday Sign Day: Falling Rocks (What It Means and How to Drive It Calmly)

    Sunday Sign Day: Falling Rocks (What It Means and How to Drive It Calmly)

    Share this:

    The Falling Rocks sign is a warning sign you’ll usually see on roads that run alongside steep hillsides, cliffs, or mountain cuts. It’s there because rocks can end up in the roadway—sometimes after rain, melting snow, freeze-thaw cycles, or wind.

    This sign isn’t meant to scare you. It’s meant to help you adjust early so you have more time to respond if something is in your lane.

    What the Falling Rocks sign means

    The sign means: rocks may fall onto the road ahead (or may already be on the road). It’s a heads-up that the area has a known history of rockfall or debris.

    In the MUTCD (the official U.S. standard for traffic signs), this is a warning sign used where rockfall is possible: FHWA MUTCD (Warning Signs).

    Why this hazard is common in spring

    Rockfall can happen any time, but it’s often more likely when conditions loosen the ground, including:

    • Melting snow that saturates soil and cracks
    • Heavy rain that increases runoff and erosion
    • Freeze-thaw cycles that expand cracks in rock and pavement edges
    • Wind that knocks loose already-fractured material

    In other words: spring weather can change the roadside faster than you’d expect—especially on roads carved into hillsides.

    For a general overview of how weather and slope conditions can affect roadway safety, FHWA safety resources are a credible place to learn more: FHWA Highway Safety.

    What to do when you see it (simple, practical steps)

    When you see a Falling Rocks sign, you don’t need to do anything sudden. Think smooth and prepared:

    1. Scan farther ahead than usual
      Look down the road surface, not just at the car in front of you. You’re checking for small rocks, gravel, or larger debris.
    2. Keep a steady speed (and be ready to slow gently)
      If visibility is limited (curves, shadows, rain), it’s reasonable to ease off the accelerator a bit so you have more time to respond.
    3. Increase following distance
      Extra space helps if the driver ahead brakes for debris.
    4. Stay centered in your lane
      Avoid drifting toward the shoulder where rocks often collect first.
    5. Avoid stopping in the hazard zone if you can
      If traffic allows, it’s usually better to keep moving through the area rather than stopping near a slope. (If you must stop due to traffic, that’s okay—just stay alert and keep your focus ahead.)

    If you see rocks in the road

    If debris is in your lane:

    • Brake smoothly and early (no last-second slamming if you can avoid it)
    • Check mirrors before changing lanes
    • Steer around only if it’s clearly safe
    • If the debris is large or blocking the lane, consider pulling over safely after you’re past the hazard area and reporting it (many states use 911 for immediate roadway hazards; some have a non-emergency highway number)

    A calm rule of thumb for new drivers: don’t trade one risk for another. A sudden swerve into another lane can be more dangerous than slowing down and stopping safely.

    Common misconceptions teens have about this sign

    • “It’s just for mountain roads.”
      You can see Falling Rocks signs anywhere there’s a steep cut, cliff, or unstable slope—sometimes even on smaller highways.
    • “If I don’t see rocks, I can ignore it.”
      The sign is about possibility, not a guarantee. It’s a reminder to scan and stay ready.
    • “I should hug the center line to avoid the shoulder.”
      Better: stay centered in your lane. Crossing toward the center line creates new risks with oncoming traffic.

    Closing: the goal is calm awareness, not worry

    The Falling Rocks sign is a simple message: this stretch of road can change quickly. With a little extra scanning and space, you can drive it smoothly and confidently.

    If you want a calm, visual way to learn road signs and rules (and the “why” behind them), you can explore Drivebook at https://mydrivebook.com.

    Sources:
    FHWA MUTCD – Part 2C (Warning Signs and Object Markers) (covers warning sign standards; relevant section for the Falling Rocks warning sign)
    https://mutcd.fhwa.dot.gov/htm/2009/part2/part2c.htm

    FHWA – Highway Safety (general roadway safety guidance and context)
    https://highways.dot.gov/safety

    Share this:
  • Night Driving Basics for New Drivers (Without the Stress)

    Night Driving Basics for New Drivers (Without the Stress)

    Share this:

    Night driving can feel like a whole new skill set—darker roads, brighter headlights, and fewer visual cues. The good news is that a few simple habits can make night driving feel calmer and more predictable. This post is for early driving knowledge and permit test prep (not behind-the-wheel instruction), so you’ll understand what to look for and why it matters.

    These basics are helpful for permit test prep and understanding common night driving rules without memorizing them blindly.

    1) Use your headlights early—and use the right setting

    Headlights aren’t just for helping you see—they help other drivers see you. A good rule of thumb: if the sky is dim, it’s raining, or you’re having trouble seeing details clearly, turn your headlights on.

    • Low beams are the default for most night driving.
    • High beams can help on dark roads with no oncoming traffic, but they should be dimmed for oncoming cars and when you’re following someone closely.

    On many permit tests, you’ll see questions about when to use headlights and when to avoid high beams. The “why” is simple: high beams can reduce safety if they glare into someone else’s eyes.

    2) Look farther ahead than you think you need to

    At night, your “seeing distance” shrinks. That means you have less time to notice a curve, a stopped car, a pedestrian, or an animal near the roadway.

    Try to build the habit of scanning farther down the road instead of focusing only on what’s directly in front of your car. When you look ahead, you naturally give yourself more time to make smooth, calm decisions.

    3) Don’t stare at oncoming headlights—use your lane position as a guide

    Bright headlights can feel distracting, especially when you’re new. If you stare at them, your eyes may take longer to readjust to the darker road.

    Instead, keep your attention on:

    • The right edge line (or the road’s edge) as a reference
    • The center line and your lane position
    • The general shape of the road ahead

    This is a common permit-test concept: avoid glare by shifting your focus to a safer visual reference, not by “fighting” the brightness.

    4) Give yourself a little more following distance

    Even if your speed stays the same, night conditions can make it harder to judge distance and spot hazards early. Adding extra space between you and the car ahead gives you more time to react smoothly.

    Think of it as “building in calm.” More space means fewer sudden decisions—especially if the car ahead brakes unexpectedly or you encounter something you didn’t see right away.

    5) Keep your windshield and mirrors clean (it matters more than you’d expect)

    A slightly dirty windshield can turn headlights into a blurry glare. The same goes for side mirrors and the rearview mirror.

    Quick, practical habits:

    • Wipe the inside of the windshield too (it can film over)
    • Clean mirrors so lights don’t streak
    • Make sure your wipers aren’t smearing

    This isn’t about perfection—it’s about reducing visual “noise” so your brain can focus on the road.

    6) Watch for pedestrians and cyclists in places you might not expect

    At night, people can be harder to see—especially if they’re wearing dark clothing. Pay extra attention near:

    • Crosswalks and intersections
    • Bus stops
    • Parking lot entrances
    • Neighborhood streets

    For permit prep, it helps to remember that you’re responsible for scanning even when the road looks empty. Night driving often feels quiet, but that doesn’t mean there’s nothing happening.

    Closing thought

    Night driving doesn’t have to feel intimidating. When you use your lights correctly, scan farther ahead, and give yourself a little extra space, you’re creating a safer, calmer driving environment—one choice at a time. If you’re studying for a permit test, these habits also connect directly to the “why” behind many common rules.

    These are the kinds of patterns you’ll see repeated in permit questions—understanding them now makes the test feel a lot more predictable.

    Share this: