Category: Teen Driver Safety

Safe habits

Risk awareness

Restrictions

Real-world driving decisions

  • Sunday Sign Day: Speed Limit Signs

    Sunday Sign Day: Speed Limit Signs

    Share this:

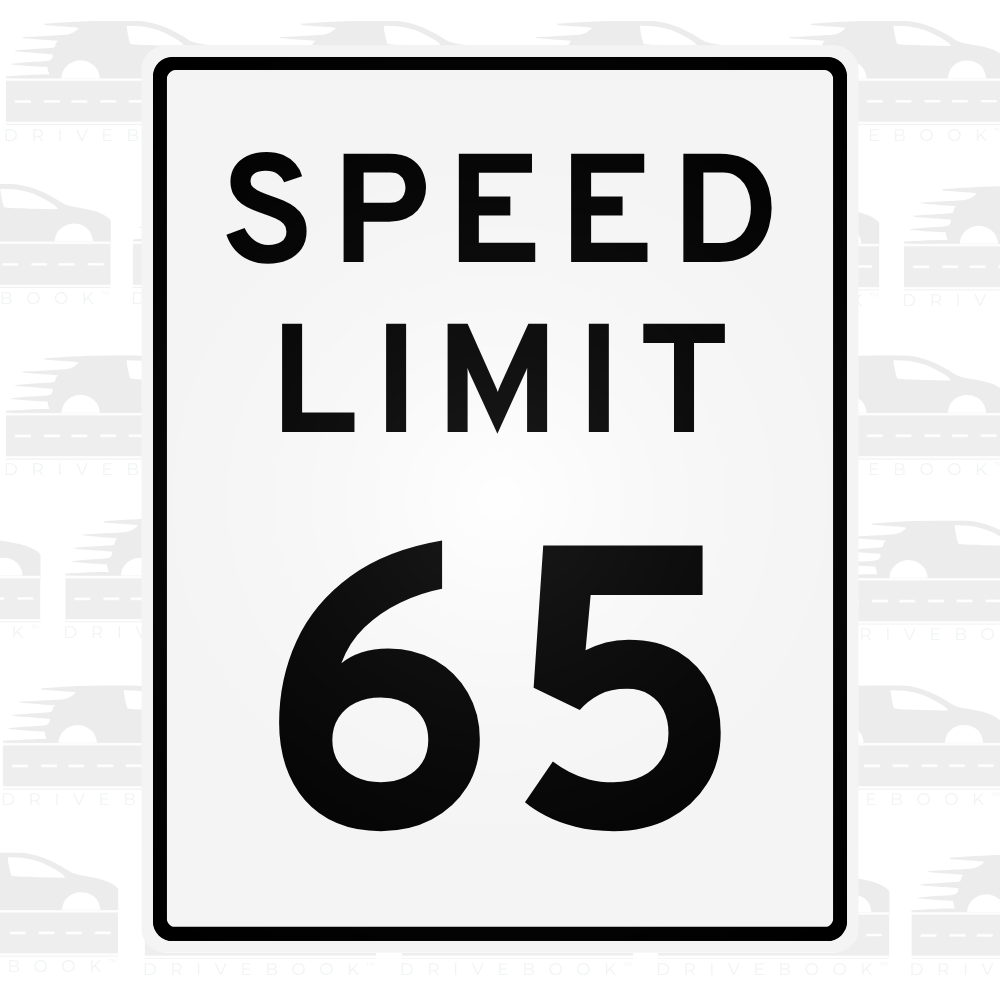
    A Speed Limit sign tells you the maximum legal speed for that stretch of road, under normal conditions. It’s one of the most common signs on the permit test — and one of the easiest to misunderstand in real life.

    The calm way to think about it is: the speed limit is a cap, not a goal. Your job is to choose a speed that stays legal and fits the situation (traffic, weather, visibility, road design).

    If you want to see how speed limit signs are defined and used nationally, the main reference is the MUTCD (the federal manual that sets sign standards):

    What a Speed Limit sign means (in plain language)

    A Speed Limit sign means:

    • Do not drive faster than the number shown (in miles per hour, in the U.S.).
    • The limit applies from the sign forward until it changes (with a new speed limit sign) or you enter a zone where a different limit is posted.
    • The limit assumes normal driving conditions.

    Some roads also use related signs like Minimum Speed, Night Speed, Truck Speed, or Reduced Speed Ahead. Those are all clues that the “right” speed may vary by vehicle type, time, or upcoming road design.

    When to slow down: before the sign or at the sign?

    This is a super common misunderstanding.

    If the speed limit is going DOWN

    In most cases, the expectation is that you’re at (or under) the new speed by the time you reach the sign, because the sign marks where the new limit begins.

    A calm habit:

    • See the sign early
    • Ease off the accelerator
    • Adjust smoothly so you’re at the new speed as you pass it

    If you see a Reduced Speed Ahead sign first, that’s your early warning to start slowing before the new speed limit sign.

    If the speed limit is going UP

    You can usually wait until you reach the sign, then gently accelerate after you pass it.

    (And if traffic or conditions don’t support the higher speed, it’s okay to stay a bit under.)

    Why speed limits exist

    Speed limits are set to balance a few things at once:

    • Road design (curves, hills, lane width, entrances/exits)
    • Traffic patterns (how many cars, how many turning points)
    • People walking or biking nearby
    • Stopping distance (how long it takes to slow down safely)

    A simple idea that helps: the faster you go, the more space you need to stop — and the less time you have to notice and respond.

    What to do when you see a Speed Limit sign

    1) Check your speed — gently, not suddenly

    If you’re above the limit, ease off the accelerator and adjust smoothly. Sudden braking can surprise the driver behind you.

    2) Match the limit and the conditions

    Even if the posted limit is 65, you may need to drive slower when:

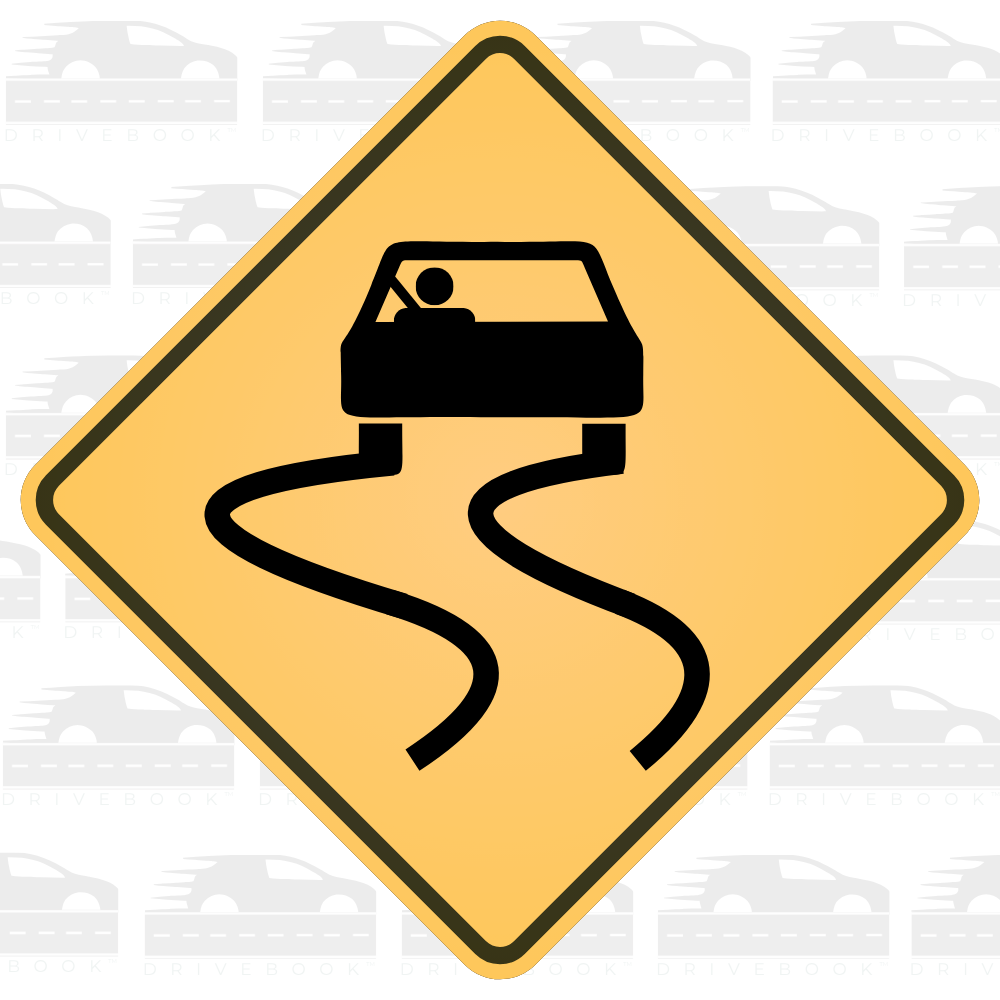
    • The road is wet or icy
    • Visibility is limited (rain, fog, glare, darkness)
    • Traffic is heavy
    • The road is unfamiliar

    Most state driver handbooks include a “basic speed law” idea: you must drive at a speed that’s reasonable and prudent for conditions — even if that means below the posted limit.

    3) Look ahead for “speed change” clues

    Speed limits often change near:

    • Town lines or neighborhoods
    • School zones (with special rules and times)
    • Construction zones
    • Curves, hills, or ramps

    If you see Reduced Speed Ahead, that’s your early reminder to start easing down before the new limit begins.

    4) Keep a steady following distance

    Speed choice and following distance go together. A calm baseline is the 3-second rule in good conditions (more time in rain, snow, or darkness).

    NHTSA’s safe driving guidance is a helpful reference here:  NHTSA — Speeding .

    Quick note: consequences of breaking the speed limit (legal + natural)

    Consequences vary by state and situation, but speeding can lead to:

    Legal consequences

    • A traffic stop and ticket/fine
    • Points on your license (which can affect new drivers quickly)
    • Higher insurance costs
    • In some cases, license restrictions or suspension (especially for teens or repeat offenses)

    Natural consequences (what tends to happen in real driving)

    Even when the legal consequences are minor, speeding can create real-world consequences like:

    • Less time to react to a car braking, a light changing, or a pedestrian stepping toward a crosswalk
    • Longer stopping distance, especially on wet roads
    • Harder steering control on curves, ramps, or rough pavement
    • A higher chance that a small mistake becomes a crash
    • More severe outcomes if a crash happens (because impact forces increase as speed increases)

    This isn’t about being perfect — it’s about giving yourself enough time and space to make calm decisions.

    Common misconceptions teens have

    Misconception 1: “The speed limit is the speed you’re supposed to drive.”

    Not always. It’s the maximum under normal conditions. If conditions are worse, the safe choice is often slower.

    Misconception 2: “If everyone else is speeding, it’s okay.”

    It can feel awkward to be the one going the limit, but you’re still responsible for your own speed. If traffic is moving faster than you’re comfortable with, a calm option is to stay in the right lane (when appropriate) and keep your space.

    Misconception 3: “I can speed a little and it doesn’t matter.”

    Even small increases in speed can reduce your reaction time and increase stopping distance. On the permit test, the safest answer is simple: follow the posted limit and adjust down for conditions.

    A quick coaching tip for parents

    Try pairing speed with one repeatable question:

    • “What’s the limit here — and do conditions suggest we should be a little under it?”

    It keeps the focus on judgment, not pressure.

    Closing (gentle CTA)

    Speed Limit signs are about more than a number — they’re a reminder to drive at a pace that fits the road and keeps your decisions calm and predictable.

    If you’d like a clear, visual way to learn signs and rules (with explanations that make the “why” easier to remember), visit mydrivebook.com.

    Share this:
  • Sunday Sign Day: Two-Way Traffic (What It Means and How to Drive It Confidently)

    Sunday Sign Day: Two-Way Traffic (What It Means and How to Drive It Confidently)

    Share this:

    The Two-Way Traffic sign is a warning sign that tells you something important is about to change:
    traffic will now be moving in both directions.

    You’ll usually see this sign when a road shifts from one-way to two-way, when a divided highway ends, or when a median disappears. It’s not there to catch you off guard — it’s there to give you time to adjust.

    When a road becomes two-way, the environment changes in a subtle but important way. You’re no longer just moving with traffic — you’re now sharing the road with vehicles coming toward you.

    That shift requires a different kind of awareness.

    Instead of only focusing forward, you need to:

    • Stay clearly centered in your lane
    • Be aware of oncoming traffic at all times
    • Adjust your spacing, especially on narrower roads
    • Stay alert on curves, hills, or areas with limited visibility

    This is especially important at night or in poor weather, when it’s harder to judge distance or see lane markings clearly. A road that felt simple a moment ago can feel tighter once traffic is moving in both directions.

    That doesn’t mean it’s harder — it just means your awareness needs to shift.

    The Two-Way Traffic sign is there to help you make that shift early, so nothing about the change feels sudden or stressful.


    Why This Sign Matters

    New drivers often feel uneasy when road patterns change unexpectedly. But this sign removes that uncertainty.

    It’s not about memorizing what to do — it’s about understanding what’s happening.

    When you know traffic is now moving both ways, you can:

    • anticipate oncoming vehicles
    • stay positioned correctly
    • and drive more smoothly without hesitation

    💡 Drivebook Tip:
    When you see a Two-Way Traffic sign, take a second to reset your awareness. Check your lane position, scan ahead, and stay centered. Small adjustments early make driving feel easier — and more controlled.


    Final Thought

    Driving becomes easier when changes don’t feel like surprises.

    The Two-Way Traffic sign is a simple reminder:
    pay attention, adjust early, and keep your awareness wide — not just forward.

    That’s how confident drivers stay in control.

    Share this:
  • Sunday Sign Day: Deer Crossing

    Sunday Sign Day: Deer Crossing

    Share this:

    In many areas, spring is an especially important time to take Deer Crossing signs seriously. As temperatures warm up, deer movement increases — they’re more active at dawn and dusk, may travel more after winter, and roadside greenery can make them harder to spot until they’re close.

    You don’t need to drive in a tense way. The goal is simply to give yourself a little more time and space so you can respond smoothly.

    The Deer Crossing sign is a warning sign. In plain language, it means: wildlife may enter the roadway here, so it’s smart to slow down a bit and stay alert.

    This sign isn’t a guarantee you’ll see deer — it’s just a heads-up that this stretch of road has a higher chance of wildlife crossings.

    For sign standards and examples, the national reference is the MUTCD (FHWA). Many state driver manuals also explain what to do in wildlife areas (for example, the California DMV Handbook — Special Situations: Animals).


    What the Deer Crossing sign means (and what it doesn’t)

    It means:

    • Deer (and sometimes other animals) may cross unexpectedly
    • The area may be near woods, fields, water, or known wildlife paths
    • You should give yourself more time to react

    It doesn’t mean:

    • Deer will only cross at the sign
    • It’s safe to swerve if you see an animal
    • You should stop in the roadway to look for wildlife

    A calm goal is to keep your options open: more space, a little less speed, and steady attention.


    Why this sign exists

    Wildlife collisions are common enough that higher-risk areas are marked. Deer are most active around dawn and dusk, and they often travel in groups — if you see one, there may be another close behind.

    This sign helps reduce surprise. It reminds drivers to scan the road edges and avoid sudden moves if an animal appears.

    (For broader safety context, the Insurance Institute for Highway Safety has helpful information on animal-related crashes.)


    What to do when you see it

    Here’s a simple, teen-friendly plan:

    1) Ease your speed and increase following distance
    No need to brake hard — just ease off the gas and give yourself more space to respond smoothly.

    2) Scan the edges of the road
    Deer often appear from tree lines or tall grass. Try a steady scan:

    • Far ahead (especially where headlights reach at night)
    • Road edges and shoulders
    • Just beyond the shoulder

    3) Use high beams when appropriate (at night)
    On dark roads without oncoming traffic, high beams help you see farther. Dim them when needed.

    4) If you see a deer, brake firmly and stay in your lane
    This is the most important part:

    • Brake in a straight line
    • Stay in your lane
    • Avoid swerving — it often creates a bigger risk

    If there’s time, a quick horn tap can encourage the animal to move away.


    Common misconceptions teens have

    “The sign shows where deer cross.”
    Think of it as a zone — deer can cross anywhere nearby.

    “Once one deer passes, I’m in the clear.”
    Deer often travel in groups. Keep scanning.

    “Swerving is safer than braking.”
    It can feel faster, but it’s riskier. Straight-line braking keeps you in control and predictable.


    A quick coaching tip (for parents and teen drivers)

    Try a calm callout routine:

    Parent/coach: “Deer Crossing sign — let’s add space and scan the shoulders.”
    Teen: “Easing off the gas and checking left/right edges.”

    It’s simple, but it builds a repeatable habit.


    Closing

    The Deer Crossing sign is a reminder to drive with a little extra margin — more space, steady scanning, and smooth braking if something appears.

    If you’d like a calm, visual way to learn road signs and rules (with explanations you can talk through as a family), visit mydrivebook.com.

    Share this:
  • Sunday Sign Day: Soft Shoulder

    Sunday Sign Day: Soft Shoulder

    Share this:

    (Soft shoulder ≠ a safe place for your car to cry)

    Everyone needs a soft shoulder to cry on sometimes—thankfully, your car does not. And driving on a soft shoulder can be more dangerous than it looks.

    The Soft Shoulder sign is a warning that the edge of the road (the shoulder) is not as stable or firm as the main driving surface. It might be gravelly, muddy, sandy, uneven, or simply not packed down the same way as the travel lane.

    This sign isn’t telling you that something is definitely wrong. It’s giving you a calm heads-up so you don’t accidentally drift off the pavement and then overcorrect.

    For official U.S. sign standards and usage, the Soft Shoulder sign is covered in the MUTCD’s warning sign guidance: FHWA MUTCD (Warning Signs).


    What “soft shoulder” means in plain language

    A “soft shoulder” means:

    • The shoulder may sink under a tire
    • The edge may be lower than the pavement
    • The surface may be loose (gravel) or slick (mud/wet grass)
    • It may be harder to steer or brake smoothly if you’re partly off the road


    Why this sign exists

    Shoulders are there to give drivers extra space for emergencies, breakdowns, and (in some places) bikes or stopped vehicles. But not every shoulder is built the same.

    A soft shoulder can cause a problem when a driver:
    • Drifts off the edge slightly, then
    • Panics and jerks the wheel back onto the pavement

    That quick “snap back” can lead to loss of control. The sign is there to reduce that risk by encouraging steadier, more intentional driving near the edge.

    For broader roadway safety context and driver behavior resources, FHWA’s safety hub is a credible reference: FHWA Highway Safety.


    🌱 Why this matters even more in the spring

    Soft shoulders can be an issue any time of year, but spring is when road edges can change quickly—sometimes from one week to the next.

    A few reasons:

    • Spring thaw softens the ground
    • More rain increases saturation and instability
    • Freeze–thaw cycles can create uneven edges or drop-offs
    • Road work season introduces temporary surfaces and loose gravel

    So in spring, it helps to treat “Soft Shoulder” as a reminder to drive a little more precisely: stay centered, scan ahead, and avoid last-second steering.


    What you should do when you see this sign

    You don’t need a dramatic response. Think: stay centered, stay smooth, stay aware.

    • Hold a steady lane position (avoid drifting toward the white line)
    • Slow slightly if conditions are wet or visibility is limited
    • Increase following distance
    • Be extra cautious passing cyclists or stopped vehicles

    💬 Coach cue:
    “Let’s drive like the edge is less forgiving here.”


    If your tires drop onto the shoulder

    1. Stay calm and keep the wheel steady
    2. Ease off the accelerator (don’t slam the brakes)
    3. Let the car slow gradually
    4. Check mirrors and traffic
    5. Gently steer back onto the pavement when it’s safe

    Key idea: slow first, then return. Sudden steering is what causes the bigger problem.


    Common misconceptions

    • “The shoulder is basically the same as the road.”
    → Sometimes—but this sign means it might not be.

    • “If I drift off, I should jerk back fast.”
    → Fast corrections can cause skidding or loss of control.

    • “This only matters in rural areas.”
    → It can happen anywhere, especially near construction zones.


    Closing

    A soft shoulder simply means: be a little more precise.

    With calm steering, a centered lane position, and a little extra space, it’s an easy hazard to manage.


    If you want a calm, visual way to learn road signs and rules (and understand the “why” behind them), you can explore Drivebook:
    https://mydrivebook.com


    References

    • FHWA MUTCD (Warning Signs – Part 2C)
    • FHWA Highway Safety

    Share this:
  • Sunday Sign Day: Falling Rocks (What It Means and How to Drive It Calmly)

    Sunday Sign Day: Falling Rocks (What It Means and How to Drive It Calmly)

    Share this:

    The Falling Rocks sign is a warning sign you’ll usually see on roads that run alongside steep hillsides, cliffs, or mountain cuts. It’s there because rocks can end up in the roadway—sometimes after rain, melting snow, freeze-thaw cycles, or wind.

    This sign isn’t meant to scare you. It’s meant to help you adjust early so you have more time to respond if something is in your lane.

    What the Falling Rocks sign means

    The sign means: rocks may fall onto the road ahead (or may already be on the road). It’s a heads-up that the area has a known history of rockfall or debris.

    In the MUTCD (the official U.S. standard for traffic signs), this is a warning sign used where rockfall is possible: FHWA MUTCD (Warning Signs).

    Why this hazard is common in spring

    Rockfall can happen any time, but it’s often more likely when conditions loosen the ground, including:

    • Melting snow that saturates soil and cracks
    • Heavy rain that increases runoff and erosion
    • Freeze-thaw cycles that expand cracks in rock and pavement edges
    • Wind that knocks loose already-fractured material

    In other words: spring weather can change the roadside faster than you’d expect—especially on roads carved into hillsides.

    For a general overview of how weather and slope conditions can affect roadway safety, FHWA safety resources are a credible place to learn more: FHWA Highway Safety.

    What to do when you see it (simple, practical steps)

    When you see a Falling Rocks sign, you don’t need to do anything sudden. Think smooth and prepared:

    1. Scan farther ahead than usual
      Look down the road surface, not just at the car in front of you. You’re checking for small rocks, gravel, or larger debris.
    2. Keep a steady speed (and be ready to slow gently)
      If visibility is limited (curves, shadows, rain), it’s reasonable to ease off the accelerator a bit so you have more time to respond.
    3. Increase following distance
      Extra space helps if the driver ahead brakes for debris.
    4. Stay centered in your lane
      Avoid drifting toward the shoulder where rocks often collect first.
    5. Avoid stopping in the hazard zone if you can
      If traffic allows, it’s usually better to keep moving through the area rather than stopping near a slope. (If you must stop due to traffic, that’s okay—just stay alert and keep your focus ahead.)

    If you see rocks in the road

    If debris is in your lane:

    • Brake smoothly and early (no last-second slamming if you can avoid it)
    • Check mirrors before changing lanes
    • Steer around only if it’s clearly safe
    • If the debris is large or blocking the lane, consider pulling over safely after you’re past the hazard area and reporting it (many states use 911 for immediate roadway hazards; some have a non-emergency highway number)

    A calm rule of thumb for new drivers: don’t trade one risk for another. A sudden swerve into another lane can be more dangerous than slowing down and stopping safely.

    Common misconceptions teens have about this sign

    • “It’s just for mountain roads.”
      You can see Falling Rocks signs anywhere there’s a steep cut, cliff, or unstable slope—sometimes even on smaller highways.
    • “If I don’t see rocks, I can ignore it.”
      The sign is about possibility, not a guarantee. It’s a reminder to scan and stay ready.
    • “I should hug the center line to avoid the shoulder.”
      Better: stay centered in your lane. Crossing toward the center line creates new risks with oncoming traffic.

    Closing: the goal is calm awareness, not worry

    The Falling Rocks sign is a simple message: this stretch of road can change quickly. With a little extra scanning and space, you can drive it smoothly and confidently.

    If you want a calm, visual way to learn road signs and rules (and the “why” behind them), you can explore Drivebook at https://mydrivebook.com.

    Sources:
    FHWA MUTCD – Part 2C (Warning Signs and Object Markers) (covers warning sign standards; relevant section for the Falling Rocks warning sign)
    https://mutcd.fhwa.dot.gov/htm/2009/part2/part2c.htm

    FHWA – Highway Safety (general roadway safety guidance and context)
    https://highways.dot.gov/safety

    Share this:
  • Night Driving Basics for New Drivers (Without the Stress)

    Night Driving Basics for New Drivers (Without the Stress)

    Share this:

    Night driving can feel like a whole new skill set—darker roads, brighter headlights, and fewer visual cues. The good news is that a few simple habits can make night driving feel calmer and more predictable. This post is for early driving knowledge and permit test prep (not behind-the-wheel instruction), so you’ll understand what to look for and why it matters.

    These basics are helpful for permit test prep and understanding common night driving rules without memorizing them blindly.

    1) Use your headlights early—and use the right setting

    Headlights aren’t just for helping you see—they help other drivers see you. A good rule of thumb: if the sky is dim, it’s raining, or you’re having trouble seeing details clearly, turn your headlights on.

    • Low beams are the default for most night driving.
    • High beams can help on dark roads with no oncoming traffic, but they should be dimmed for oncoming cars and when you’re following someone closely.

    On many permit tests, you’ll see questions about when to use headlights and when to avoid high beams. The “why” is simple: high beams can reduce safety if they glare into someone else’s eyes.

    2) Look farther ahead than you think you need to

    At night, your “seeing distance” shrinks. That means you have less time to notice a curve, a stopped car, a pedestrian, or an animal near the roadway.

    Try to build the habit of scanning farther down the road instead of focusing only on what’s directly in front of your car. When you look ahead, you naturally give yourself more time to make smooth, calm decisions.

    3) Don’t stare at oncoming headlights—use your lane position as a guide

    Bright headlights can feel distracting, especially when you’re new. If you stare at them, your eyes may take longer to readjust to the darker road.

    Instead, keep your attention on:

    • The right edge line (or the road’s edge) as a reference
    • The center line and your lane position
    • The general shape of the road ahead

    This is a common permit-test concept: avoid glare by shifting your focus to a safer visual reference, not by “fighting” the brightness.

    4) Give yourself a little more following distance

    Even if your speed stays the same, night conditions can make it harder to judge distance and spot hazards early. Adding extra space between you and the car ahead gives you more time to react smoothly.

    Think of it as “building in calm.” More space means fewer sudden decisions—especially if the car ahead brakes unexpectedly or you encounter something you didn’t see right away.

    5) Keep your windshield and mirrors clean (it matters more than you’d expect)

    A slightly dirty windshield can turn headlights into a blurry glare. The same goes for side mirrors and the rearview mirror.

    Quick, practical habits:

    • Wipe the inside of the windshield too (it can film over)
    • Clean mirrors so lights don’t streak
    • Make sure your wipers aren’t smearing

    This isn’t about perfection—it’s about reducing visual “noise” so your brain can focus on the road.

    6) Watch for pedestrians and cyclists in places you might not expect

    At night, people can be harder to see—especially if they’re wearing dark clothing. Pay extra attention near:

    • Crosswalks and intersections
    • Bus stops
    • Parking lot entrances
    • Neighborhood streets

    For permit prep, it helps to remember that you’re responsible for scanning even when the road looks empty. Night driving often feels quiet, but that doesn’t mean there’s nothing happening.

    Closing thought

    Night driving doesn’t have to feel intimidating. When you use your lights correctly, scan farther ahead, and give yourself a little extra space, you’re creating a safer, calmer driving environment—one choice at a time. If you’re studying for a permit test, these habits also connect directly to the “why” behind many common rules.

    These are the kinds of patterns you’ll see repeated in permit questions—understanding them now makes the test feel a lot more predictable.

    Share this:
  • Sunday Sign Day: The Slippery When Wet Sign

    Sunday Sign Day: The Slippery When Wet Sign

    Share this:
    Slippery When Wet Sign

    As spring weather arrives, rain becomes more frequent — and so does the need to pay attention to road conditions. The “Slippery When Wet” sign is one you’ll see often, especially in areas with frequent rain, near bridges, or on roads that tend to collect water. It’s a warning sign, which means it’s giving you advance notice of a condition that requires extra caution.

    Understanding what makes a road slippery, and what to do when you see this sign, can help you stay in control when conditions change quickly — something that happens often during spring.


    What the Sign Looks Like

    The Slippery When Wet sign is a yellow diamond with a black symbol showing a car with skid marks trailing behind it. The image is simple and visual — you don’t need to read words to understand that traction may be reduced ahead.

    Yellow diamond signs are always warnings. They alert you to upcoming road conditions, hazards, or changes that require you to adjust your speed or attention. According to the Manual on Uniform Traffic Control Devices (MUTCD), warning signs are placed in advance of the hazard to give drivers time to respond safely.


    What It Means

    This sign warns that the road surface ahead is more likely to become slippery when wet — more so than a typical road. That could be due to:

    • Road surface material: Some pavement types (like certain asphalt mixes or painted surfaces) become especially slick when wet.
    • Oil buildup: Roads that don’t get much rain can accumulate oil and residue. When it finally does rain, that layer mixes with water and creates a slippery film — especially dangerous during the first few minutes of rainfall.
    • Drainage issues: Areas where water pools or doesn’t drain well are more prone to hydroplaning.
    • Bridge decks and overpasses: These freeze before regular roads and can stay wet longer, making them particularly hazardous in cold or rainy weather.

    The sign doesn’t mean the road is always slippery — it means you should expect reduced traction when conditions are wet.


    What You Should Do

    When you see this sign:

    • Slow down before the road gets wet, not after. If it’s already raining or the pavement looks wet, reduce your speed as you approach the signed area.
    • Increase your following distance. Wet roads can double your stopping distance. Give yourself more space between you and the car ahead.
    • Avoid sudden movements. Hard braking, sharp turns, or quick lane changes can cause your tires to lose grip on slippery pavement.
    • If you start to skid, ease off the accelerator and steer gently in the direction you want to go. Don’t slam the brakes.

    The NHTSA’s guidance on driving in wet conditions emphasizes that most skid-related crashes happen because drivers don’t adjust their speed soon enough.


    Common Misconceptions

    “I have good tires, so I don’t need to slow down.” Even new tires can lose traction on a slippery surface, especially if there’s oil buildup or standing water. Tires help, but they’re not a substitute for adjusting your driving.

    “The sign is just there all the time — it doesn’t mean anything right now.” Warning signs are placed based on known hazards. If the sign is there, the road has a history of being slippery when wet. Take it seriously, even if conditions seem fine at the moment.

    “I’ll just brake earlier if I need to.” Braking on a slippery surface is less effective and can cause a skid. The better approach is to drive slower from the start so you don’t need to brake hard.


    For Parents and Coaches

    This is a great sign to practice with. If you see one on a dry day, point it out and talk through what your teen would do differently if it were raining. Building that mental habit — connecting the sign to the action — makes it more automatic when conditions actually change.


    Why This Sign Matters

    Slippery When Wet signs exist because certain stretches of road are genuinely more dangerous in wet conditions. Recognizing the sign and responding to it appropriately is a simple but important part of defensive driving — especially as spring showers become more common.

    For more clear, visual explanations of road signs and driving rules, visit Drivebook at mydrivebook.com.


    Sources:

    Share this:
  • What New Drivers Should Know About Roundabouts

    What New Drivers Should Know About Roundabouts

    Share this:
    Aerial view of a U.S. roundabout showing cars entering and yielding

    Roundabouts are showing up on more roads across the US, and they tend to catch drivers off guard — new and experienced alike. Even some seasoned drivers who never had a clear explanation of how roundabouts work can find themselves hesitating at the entry point. Once you understand how they work and why, they are actually one of the more straightforward intersections you will encounter.


    What a Roundabout Actually Is

    A roundabout is a circular intersection where traffic flows in one direction — counterclockwise — around a central island. Instead of stopping at a red light, drivers slow down, yield to traffic already in the circle, and then merge in when there is a safe gap.

    That is the core idea: yield before entering, then keep moving once you are inside.


    Why Roundabouts Exist

    Roundabouts are not just a design trend. According to the Federal Highway Administration (FHWA), roundabouts are a proven safety countermeasure that can substantially reduce crashes resulting in serious injury or death. The reason is simple: there are no high-speed, head-on or right-angle collisions. Traffic moves slowly and in the same direction.

    Understanding why a rule or road feature exists helps you use it correctly. Roundabouts are built for safety and flow — not to confuse you.


    The One Rule That Matters Most: Yield Before You Enter

    When you approach a roundabout, you will see a yield sign. That sign means: traffic already inside the roundabout has the right of way. You wait for a safe gap, then you enter.

    You do not stop inside the roundabout. You do not stop once you have entered and traffic is moving. You only pause at the entry point, and only if needed.

    This is the most common source of confusion — new drivers sometimes stop inside the circle or try to force their way in. Neither is correct.


    How to Choose Your Lane (Multi-Lane Roundabouts)

    Single-lane roundabouts are straightforward. Multi-lane roundabouts require a bit more planning.

    A general guide:

    • Taking the first exit (turning right): Use the right lane.
    • Going straight through: Either lane is typically acceptable, but check posted lane signs.
    • Taking a later exit (turning left or going around): Use the left lane.

    The key is to decide your lane before you enter. Changing lanes inside a roundabout is not safe and is not permitted. Look for lane-use signs as you approach — they will show you which lane leads to which exit.


    Signaling in a Roundabout

    Signaling is simple once you know the pattern:

    • Entering: You generally do not need to signal when entering.
    • Exiting: Signal right as you approach your exit. This lets other drivers and pedestrians know you are about to leave the roundabout.

    Some drivers skip this step, but using your signal when exiting is a good habit and is expected on a permit test.


    Pedestrians and Cyclists at Roundabouts

    Roundabouts have crosswalks, and pedestrians have the right of way at those crosswalks — just as they do at any intersection. Before you enter the roundabout and again as you exit, check for people crossing.

    Cyclists may ride through the roundabout in the travel lane, or they may use a separate path alongside the road. Either way, give them space and do not rush around them.


    Common Mistakes to Watch Out For

    Knowing what tends to go wrong is just as useful as knowing what to do right. These are the errors that come up most often at roundabouts — and being aware of them puts you a step ahead.

    • Stopping inside the roundabout. Once you have entered and traffic is flowing, keep moving. Stopping unexpectedly inside the circle confuses other drivers and disrupts the flow the roundabout is designed to maintain.
    • Entering without yielding. Some drivers pull in without checking for traffic already circling. The yield sign at the entry is not optional — vehicles inside always have the right of way.
    • Forgetting to signal when exiting. It is easy to focus on navigating the circle and skip the exit signal entirely. That signal matters — it tells the driver behind you and any pedestrians at the crosswalk what you are about to do.
    • Choosing the wrong lane too late. In a multi-lane roundabout, trying to sort out your lane after you have already entered creates a real problem. Lane changes inside the roundabout are not permitted. Make the decision before you arrive.
    • Going too fast on approach. Roundabouts require you to slow down and read the situation — traffic inside, pedestrians at crosswalks, lane signs. Entering at speed leaves you no time to do any of that well.
    • Overlooking pedestrians at the exit. Drivers often check for pedestrians when entering but forget to check again when exiting. Crosswalks exist at both points, and pedestrians have the right of way at both.

    Most of these mistakes come down to the same thing: moving faster than your awareness can keep up with. Slowing down on approach gives you the time to get everything right.


    A Quick Summary Before You Encounter One

    Here is what to keep in mind the next time you see a roundabout ahead:

    1. Slow down as you approach.
    1. Yield to traffic already inside the circle.
    1. Choose your lane before entering.
    1. Keep moving once you are in — do not stop.
    1. Signal right when you are ready to exit.
    1. Watch for pedestrians at crosswalks — entering and exiting.

    Roundabouts feel unfamiliar at first, but they follow a clear and consistent logic. Once you have driven through a few, the pattern becomes second nature.


    Roundabouts are a good example of a road feature that seems tricky until you understand the reasoning behind it. The rules are not arbitrary — they are designed to keep everyone moving safely. That same principle applies to most of the rules you will study for your permit test: when you understand the why, the what becomes much easier to remember.


    New to roundabouts? This guide explains how they work, who has the right of way, common mistakes to avoid, and what to expect — in plain, clear language for new drivers.


    Sources


    Share this:
  • See It, Learn It: How Visual Learning Builds Teen Driver Confidence Before the Permit Test

    See It, Learn It: How Visual Learning Builds Teen Driver Confidence Before the Permit Test

    Share this:

    See It, Learn It: How Visual Learning Builds Teen Driver Confidence Before the Permit Test

    Most teens face a flood of confusing rules before their permit test. That’s where visual learning for driving changes everything—it turns overwhelm into clear steps you can follow. With Drivebook’s two-part system, you build understanding first with PermitPro (Workbook), then lock it in with DrivebookGo (App), making teen driver permit test prep a calm, confident process for your family. For more guidance, check out this helpful resource.

    Visual Learning for Driving

    Visual learning turns complex driving rules into simple, manageable concepts. By seeing scenarios, teens can connect rules to real-life situations. This approach provides clarity, making the driving test feel less daunting.

    Building Confidence with Visual Scenarios

    Imagine learning to drive without the stress of memorizing endless rules. Visual scenarios make this possible. Seeing how rules apply in actual situations helps build confidence. Over 70% of teens find visual aids more helpful than text alone. They can picture themselves in the driver’s seat, navigating with ease. This method not only makes learning engaging but also boosts retention. By visualizing scenarios, teens develop a deeper understanding, paving the way for confident driving.

    PermitPro Workbook: Core Understanding

    The PermitPro Workbook is your teen’s roadmap to understanding driving basics. It breaks down rules into easy-to-follow sections. With visual aids, students grasp concepts quickly. Each chapter includes practice questions, allowing teens to test their knowledge. The workbook’s step-by-step approach ensures that learners build a strong foundation before hitting the road. It’s more than just studying; it’s about truly comprehending the why behind each rule. This strategy leads to safer, more informed driving habits.

    DrivebookGo App: State-Specific Practice

    DrivebookGo takes learning to the next level. This app offers practice tailored to your state’s specific rules. With interactive quizzes, teens can track their progress and focus on areas needing improvement. The app’s convenience means practice can happen anywhere, anytime. It’s the perfect companion to the workbook, reinforcing what teens learn with situational examples unique to their state. This comprehensive approach ensures that learners are ready for their permit test with confidence.

    Teen Driver Permit Test Prep

    Preparing for the permit test shouldn’t be overwhelming. By understanding before practicing, teens can approach the test with confidence. This section dives into methods that transform preparation into a stress-free experience.

    Understanding Before Practice

    Before getting behind the wheel, it’s crucial to understand driving concepts. Many teens find that grasping the why behind rules makes driving lessons more effective. By focusing on understanding, rather than rote memorization, learners are better prepared for real-world situations. This approach means that when practice begins, teens feel ready and capable. It’s not just about passing a test; it’s about becoming a safe, knowledgeable driver.

    Calm Permit Preparation at Home

    Imagine preparing for your permit test in a calm, familiar environment. Home preparation allows for this comfort. With structured resources like the PermitPro Workbook, families can create a supportive, stress-free study plan. This flexibility lets teens learn at their own pace. Parents can guide their learning journey, making it a collaborative experience. By reducing stress, the focus shifts to learning, leading to better retention and understanding.

    Road Signs Study Guide: Key to Success

    Understanding road signs is crucial for any new driver. A dedicated study guide helps teens recognize and remember these signs effectively. With visual aids, learners can quickly identify signs and understand their meanings. This knowledge is essential not only for the test but also for safe driving. By mastering road signs, teens gain the confidence to navigate roads with ease. This study guide is a key component in building a strong driving foundation.

    Family-Friendly Driver Education

    Drivebook offers a family-friendly approach to driver education. This system supports both teens and their families, creating a shared learning experience that’s enjoyable and effective.

    New Driver Study Plan

    A well-structured study plan is essential for new drivers. The PermitPro Workbook and DrivebookGo App create a tailored plan that fits your family’s schedule. With clear goals and milestones, progress is easy to track. This plan encourages consistent learning, making the process enjoyable for both teens and parents. Families can work together, turning preparation into a bonding experience. A well-thought-out plan leads to confident, prepared new drivers.

    Confidence for New Drivers

    Building confidence is key for new drivers. With the right tools, teens can approach driving with assurance. Visual learning and practice tests are crucial tools in building this confidence. They provide a safe space to learn and make mistakes without fear. As teens progress, their self-assurance grows, translating into safer driving habits. Confident drivers are not only more prepared for their tests but also more equipped for real-world driving challenges.

    Free Resources: Sample Lesson & Checklist 🚗

    At Drivebook, we believe in accessible learning. That’s why we offer free resources like sample lessons and checklists. These tools provide a glimpse into our comprehensive system. They’re designed to help teens and families get started on the right path. By exploring these resources, you can see firsthand how our system supports new drivers. These materials are just a click away, ready to transform how your family approaches driver education.

    Learn more

    Share this:
  • Super Bowl Safe Driving

    Super Bowl Safe Driving

    Share this:

    Super Bowl Driving Safety: Essential Tips for Teen Drivers and Their Families

    Super Bowl Sunday is one of the most exciting days of the year — great food, good company, and unforgettable game-day memories. But it’s also a day when roads can be busier and more unpredictable than usual. According to traffic safety research, Super Bowl Sunday tends to see higher rates of traffic fatalities and risks like impaired and distracted driving than a typical February weekend.

    At Drivebook™, we believe a smart plan and safe decisions help families enjoy the big day and get home safely. Here’s your guide to Super Bowl Sunday driving safety, with tips tailored for teen drivers and their families.

    Super Bowl Driving Safety Tips

    teenager learning to drive with parent

    With game day excitement, roads will be bustling. Preparation is your best ally. Here’s how to gear up!

    🚗 Super Bowl Sunday: What the Data Shows

    Traffic safety experts have identified Super Bowl Sunday as a higher-risk driving day due to increased travel and post-game driving. Research shows:

    While most drivers travel responsibly, the overall risk environment makes preparation especially important.

    🏁 Game-Day Traffic Safety Tips

    1. Plan Your Route Ahead of Time

    Heavy traffic and bottlenecks are common on Super Bowl Sunday — especially near popular gathering spots and stadium areas.

    Planning ahead reduces stress and helps teen drivers stay focused.

    2. Pack Essentials

    Before heading out, make sure your vehicle is ready:

    • Check gas level, oil, tire pressure, and windshield visibility

    • Bring water and snacks in case traffic slows

    • Review the route together so your teen feels confident before driving


    👩‍🎓 Teen Driver Safety Essentials

    Teen drivers face unique challenges on busy travel days — excitement, passengers, and unfamiliar traffic patterns can all affect judgment.

    3. Talk About Focus and Distractions

    Distractions remain one of the leading causes of teen crashes. Encourage your teen to:

    • Keep phones out of reach

    • Use “Do Not Disturb While Driving” settings

    • Pull over safely if they need to adjust navigation or music

    Clear expectations before leaving make a real difference.

    4. Buckle Up — Every Time

    Seat belts reduce the risk of serious injury or death in a crash by nearly half. Make seat belt use non-negotiable for every trip, no matter how short.
    👉 https://www.nhtsa.gov/something-think-about

    5. Adjust for Weather

    February weather can be unpredictable. If rain or snow is expected:

    • Reduce speed

    • Increase following distance

    • Use headlights appropriately

    Practicing these skills ahead of time builds confidence on the road.

    🛣 Game Night Travel Advice

    6. Choose the Best Time to Drive

    Timing matters on Super Bowl Sunday:

    • Roads are often quieter early before kickoff

    • Leaving shortly after the game starts can also help avoid traffic surges

    Planning your departure can significantly reduce stress and risk.

    7. Choose Safer Routes

    When possible:

    • Stick to familiar, well-lit roads

    • Use GPS tools to avoid accidents, construction, or congestion

    Familiar routes help teen drivers stay calm and focused.

    👪 Family Involvement Matters

    Safe driving habits are strongest when families work together.

    8. Create a Family Game-Day Safety Plan

    Before the game, discuss:

    • Where everyone is going

    • What to do if plans change

    • Who to contact in an emergency

    A shared plan gives both parents and teens peace of mind.

    9. Talk About Road Safety

    Use Super Bowl Sunday as a conversation starter about:

    • Impaired and distracted driving risks

    • Why planning ahead matters

    • How to stay calm in stressful driving situations

    These conversations reinforce lifelong safe driving habits.

    🏆 Final Play: Celebrate and Stay Safe

    Super Bowl Sunday is about connection, celebration, and fun — and with a little planning, it can also be a safe day on the road. Teen drivers and families who prepare ahead of time can enjoy the game and arrive home safely.

    For more information on Super Bowl driving safety, visit:
    👉 https://www.nhtsa.gov/super-bowl-sunday-fans-dont-let-fans-drive-drunk

    Enjoy the game — and drive safe.

    Share this: