Tag: driver education

  • Merge Sign (Left or Right): What It Means and How to Merge Calmly

    Merge Sign (Left or Right): What It Means and How to Merge Calmly

    Share this:


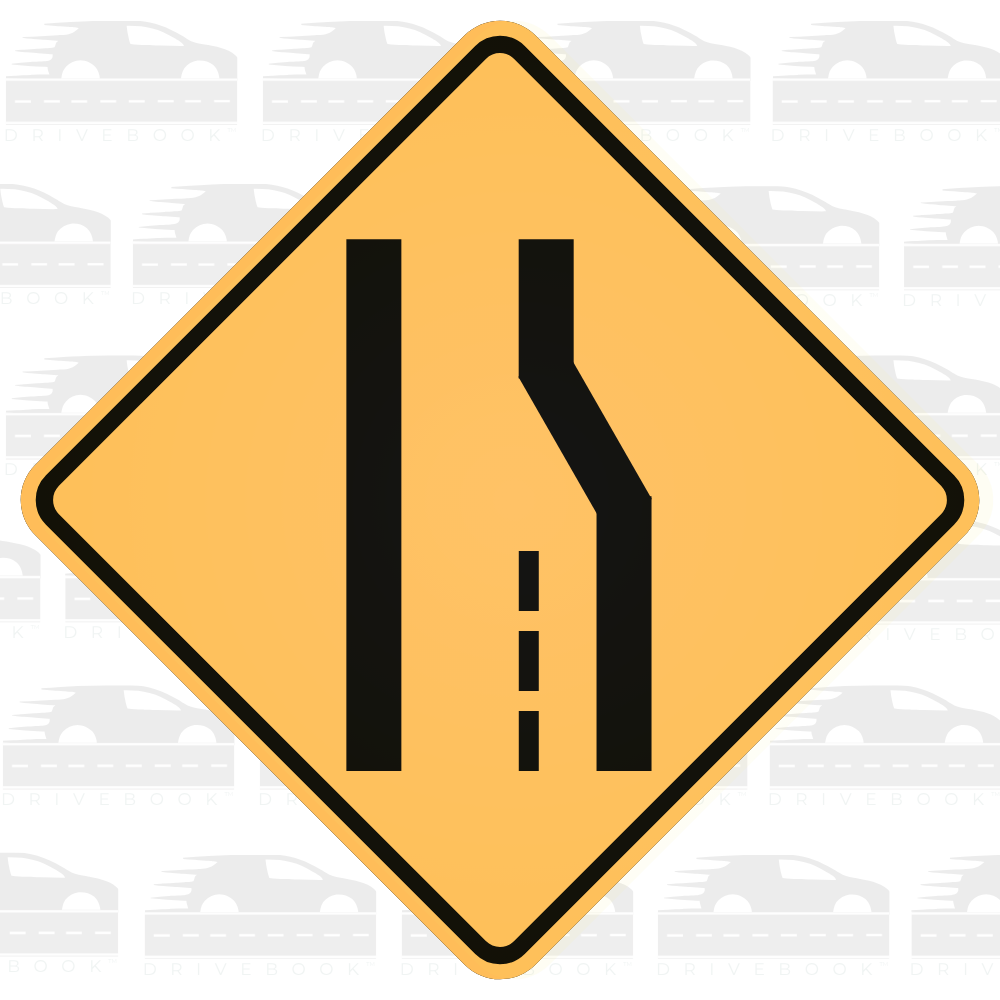
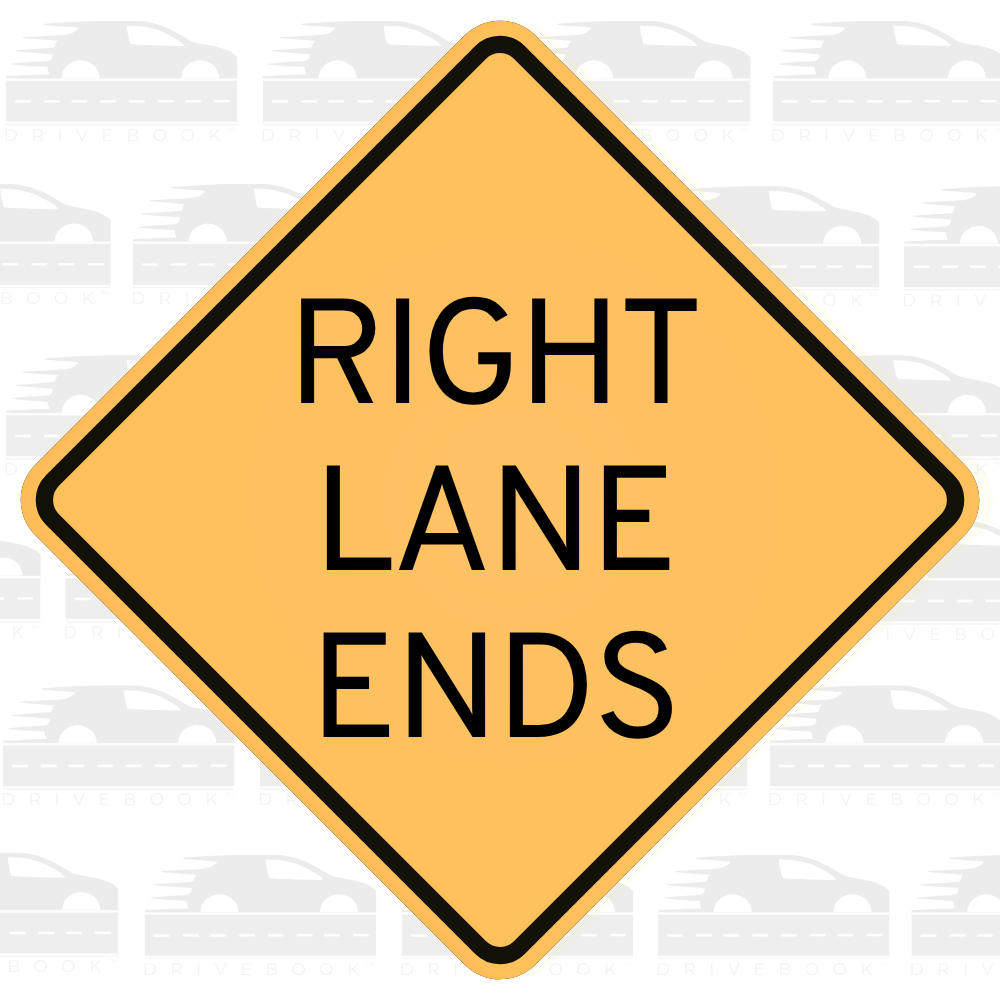
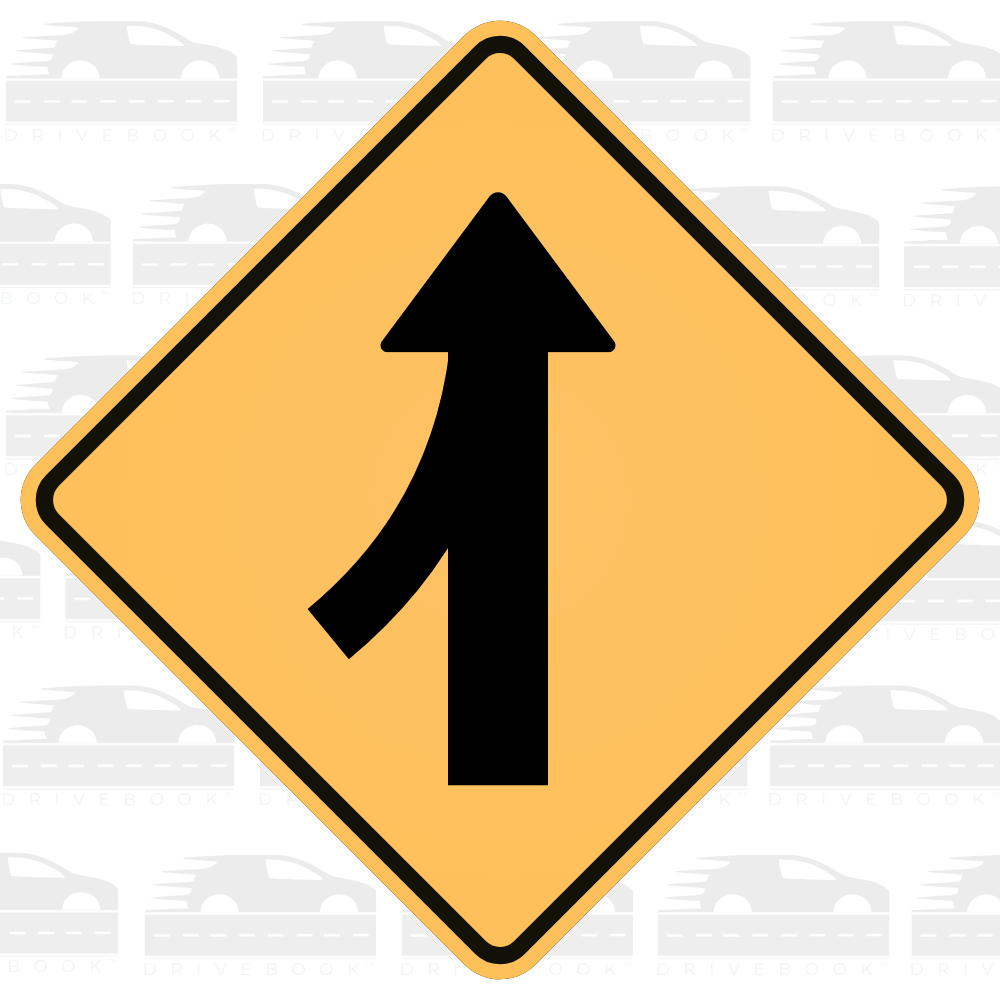
    A MERGE sign is a heads-up that two streams of traffic are about to become one. You’ll see it when a lane ends, when an on-ramp joins a highway, or when road work shifts traffic.

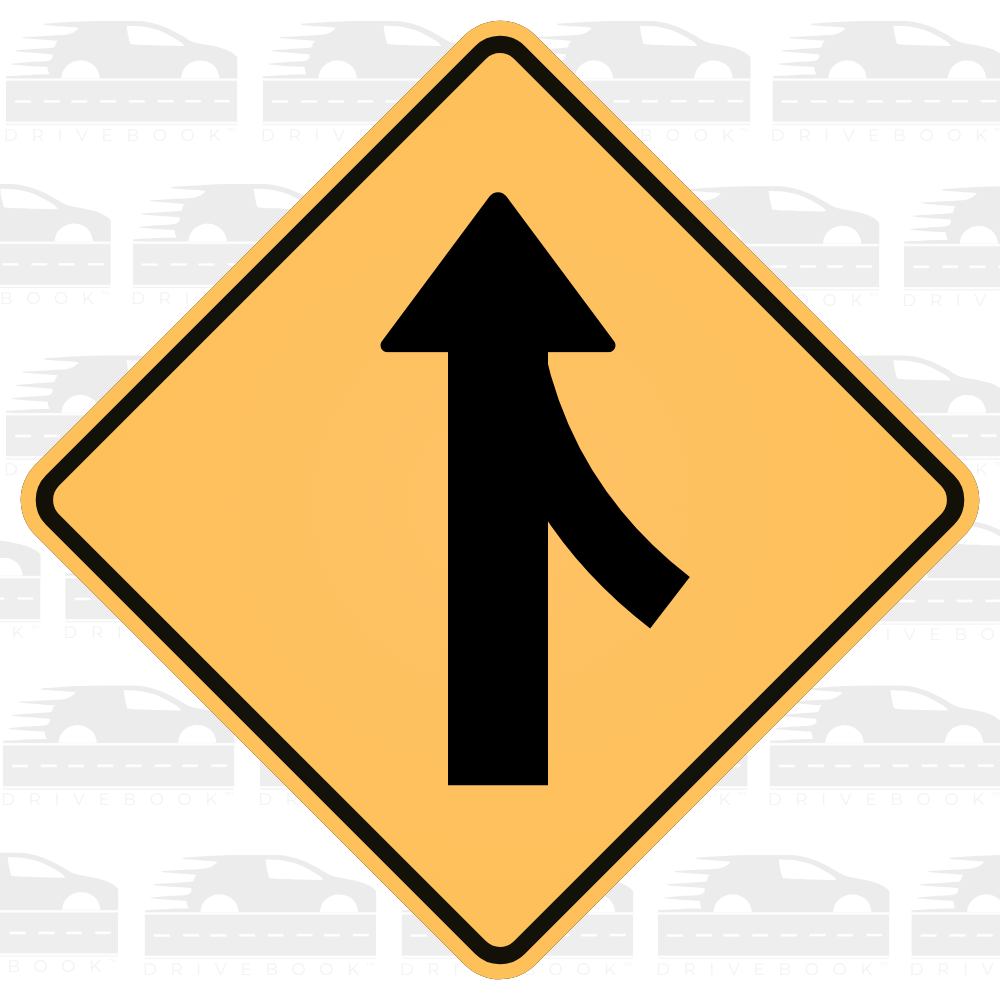
    Some merge signs show the other lane joining from the left. Others show it joining from the right. The direction matters, but the goal is the same: merge smoothly, predictably, and with enough space.

    For official sign standards and examples, the national reference is the MUTCD:

    What the Merge sign means (plain language)

    A Merge sign means:

    • A lane will join your lane soon (from the left or from the right).
    • Traffic patterns will change, so you should be ready to adjust.
    • Drivers should cooperate so everyone can move through safely.

    It does not mean “speed up and force your way in.” It also doesn’t mean “slam on the brakes.” Most merges work best when drivers stay calm and predictable.

    How to tell which direction the merge is coming from

    Look at the symbol:

    • If the side line curves into the main line from the left, traffic is merging from the left.
    • If the side line curves into the main line from the right, traffic is merging from the right.

    That tells you where to focus your attention.

    What you should do when you see a Merge sign

    Here’s a simple, repeatable process:

    1. Check your mirrors early Know who’s behind you and who’s next to you.
    2. Ease off the gas if needed (don’t rush) Small speed adjustments are usually enough.
    3. Create space If you’re in the lane that will continue, leaving a safe gap helps the merging driver enter smoothly.
    4. Signal if you’re changing lanes If you decide to move over to avoid a conflict, signal early and move only when it’s safe.
    5. Stay predictable Sudden braking or sudden acceleration makes merging harder for everyone.

    Who yields during a merge?

    This can vary by situation and state rules, but a good general guideline is:

    • If you are changing lanes, you yield to traffic already in the lane you’re moving into.
    • If you’re already in the lane that continues, you don’t need to “give up” your lane — but you can help by maintaining a steady speed and leaving a safe gap when possible.

    If you’re unsure, the safest approach is to avoid competing for the same space at the same time.

    Common misconceptions teens have about merging

    Misconception 1: “Merging means I have the right-of-way.”

    A merge sign is a warning, not a permission slip. You still need to merge when it’s safe.

    Misconception 2: “The best merge is the fastest merge.”

    The best merge is the smoothest merge. Smooth usually means fewer surprises.

    Misconception 3: “If someone is merging, I should stop to let them in.”

    Stopping in a moving lane can create a new hazard. It’s usually better to keep moving steadily and make room with a safe gap if you can.

    A quick coaching tip for parents

    Try this calm reminder:

    • “Mirrors early, small speed change, make space, stay predictable.”

    It keeps the focus on a process your teen can repeat.

    Closing

    Merging doesn’t have to feel like a competition. When drivers look early, communicate clearly, and make small adjustments, merges become one of the most manageable parts of driving.

    For more calm, visual explanations of signs and real-world driving situations, visit mydrivebook.com.

    Share this:
  • Lane Ends (Right Lane Ends): What It Means and What to Do

    Lane Ends (Right Lane Ends): What It Means and What to Do

    Share this:

    A Lane Ends sign is a calm heads-up that the lane you’re in won’t continue. In your image, it’s specifically Right Lane Ends — meaning the right lane will end ahead, and traffic will need to move left.

    This sign isn’t telling you to panic or “fight for a spot.” It’s telling you to plan early, communicate clearly, and merge smoothly.

    For official sign standards and examples, the national reference is the MUTCD:

    What the sign means (plain language)

    Right Lane Ends means:

    • The right lane will disappear ahead.
    • Drivers in the right lane will need to merge into the left lane.
    • Drivers in the left lane should expect merging traffic and help create safe gaps.

    Where you’ll usually see it

    You’ll often see lane-ends signs near:

    • Construction zones
    • Bridges and tunnels
    • Highway on-ramps/off-ramps where lanes add and drop
    • Roads that narrow from two lanes to one

    What to do when you see it (step-by-step)

    1) Check your mirrors early

    As soon as you see the sign, do a quick scan:

    • Rearview mirror
    • Side mirror
    • A quick shoulder check when you’re ready to change lanes

    Early scanning gives you options. Late scanning makes everything feel rushed.

    2) Decide: merge early or use the full lane (both can be okay)

    Different states and situations handle this a little differently, and traffic flow matters.

    A calm, practical approach:

    • If traffic is light, it’s usually easiest to merge early.
    • If traffic is heavy and cars are moving slowly, many areas encourage using both lanes to the merge point and then taking turns (“zipper merge”).

    If you’re not sure what’s expected where you live, it’s okay to choose the safer-feeling option: signal early and merge when you have a clear gap.

    How to merge smoothly (the “zipper” idea)

    Whether you merge early or closer to the end, the goal is the same: one car from the ending lane, then one car from the continuing lane.

    If you’re in the lane that ends

    • Turn on your signal.
    • Match the speed of traffic (don’t stop unless traffic is stopped).
    • Look for a gap.
    • Merge smoothly.

    If you’re in the lane that continues

    • Keep a steady speed.
    • Leave a safe following distance.
    • If you can, create a gap for one car to merge.

    It’s not about “winning” a merge — it’s about keeping traffic predictable.

    Common misconceptions teens have

    Misconception 1: “I should stop and wait for someone to let me in.”

    Stopping in a moving lane can surprise drivers behind you. If traffic is moving, it’s usually safer to keep rolling, signal, and merge when you have a safe opening.

    Misconception 2: “The other lane has to let me in.”

    Merging is a shared job: the ending lane must merge safely, and the continuing lane should avoid blocking and help when possible.

    Misconception 3: “I need to speed up to squeeze in.”

    Speeding up quickly can create sudden braking and stress. A smoother merge usually comes from matching traffic speed and signaling early.

    A quick coaching tip for parents

    Try a simple script that keeps everyone calm:

    • “Lane ends ahead. Signal early. Find one safe gap. Smooth merge.”

    Short, repeatable, and focused on process.

    Closing

    Lane Ends signs are there to give you time — time to scan, signal, and merge without rushing. With early planning and predictable moves, merges become one of those skills that feels easier every week.

    For more calm, visual explanations of road signs and right-of-way rules, visit mydrivebook.com.

    Share this:
  • 4-Way Ahead: What It Means and How to Approach It

    4-Way Ahead: What It Means and How to Approach It

    Share this:

    A 4-Way Intersection warning sign tells you a crossing road is coming up. It’s basically a heads-up: traffic may be entering from the left and right, and you’ll need to be ready to slow down, scan, and follow any right-of-way controls you see next (like a stop sign, yield sign, or traffic signal).

    This sign doesn’t tell you who goes first by itself — it tells you to prepare.

    For official sign standards and examples, the national reference is the MUTCD:

    What the sign means (plain language)

    4-Way Intersection ahead means:

    • A road crosses your road.
    • You may have vehicles approaching from both sides.
    • You may need to stop or yield depending on the next sign or signal.

    Think of it as: “Intersection coming — get your eyes and speed ready.”

    Where you’ll usually see it

    You’ll often see this sign on roads where the intersection might not be obvious until you’re close, such as:

    • Rural roads
    • Roads with trees, buildings, or hills that limit visibility
    • Higher-speed roads where drivers need extra warning time

    What to do when you see it (step-by-step)

    1) Ease off the accelerator and cover the brake

    You don’t have to brake hard — just start reducing speed early. “Cover the brake” means placing your foot over the brake so you can respond quickly if needed.

    2) Scan in this order: ahead, left, right, ahead again

    A calm scan helps you catch:

    • A stop sign or traffic light
    • Turning vehicles
    • Cars approaching quickly from side streets
    • Pedestrians or cyclists near the corner

    3) Look for the control that actually sets right-of-way

    The 4-way intersection sign is a warning. The next control is what tells you what to do:

    • Stop sign: you must stop.
    • Yield sign: slow and yield if needed.
    • Traffic signal: follow the light.
    • No sign: follow your state’s right-of-way rules for uncontrolled intersections.

    If you’re teaching a teen, this is a great moment to practice the habit: “What’s controlling this intersection?”

    4) Make your intention obvious

    • Signal early if you’re turning.
    • Stay centered in your lane.
    • Avoid last-second lane changes.

    Predictable driving is what makes intersections feel calmer.

    Common misconceptions teens have

    Misconception 1: “This sign means I have to stop.”

    Not necessarily. It means an intersection is coming — you stop only if a stop sign, red light, or other control requires it.

    Misconception 2: “If I’m on the bigger road, I automatically go first.”

    Sometimes you do, sometimes you don’t. Right-of-way depends on signs, signals, and your state’s rules — not just which road feels “main.”

    Misconception 3: “If I don’t see a car, I can keep my speed.”

    Visibility can change fast at intersections. Slowing a little and scanning gives you more time to make a calm decision.

    A quick coaching tip for parents

    Try a simple prompt that builds the right habit:

    • “Intersection ahead — what’s the control? What’s your plan?”

    It keeps the focus on thinking, not pressure.

    Closing

    A 4-Way Intersection sign is an early reminder to slow down and scan — not a reason to stress. With a steady approach and a clear look for the next sign or signal, intersections become much more predictable.

    For more calm, visual explanations of road signs and right-of-way rules, visit mydrivebook.com.

    Share this:
  • Stop Sign: What It Means (and What a “Full Stop” Really Is)

    Stop Sign: What It Means (and What a “Full Stop” Really Is)

    Share this:

    A STOP sign is one of the clearest instructions on the road: you must come to a complete stop and follow right-of-way rules before you go.

    It’s also one of the most common places new drivers lose points on a road test — not because they’re careless, but because “stop” has a few details people don’t always explain (where to stop, how long to pause, and what to do when you can’t see).

    For official sign standards and examples, the national reference is the MUTCD:

    What a Stop sign means (plain language)

    A Stop sign means:

    • Stop completely (wheels stop moving).
    • Yield the right-of-way to pedestrians and other traffic.
    • Go only when it’s your turn and it’s safe.

    It doesn’t mean “slow down a lot.” It doesn’t mean “stop if someone’s coming.” It means stop every time.

    What a “full stop” actually looks like

    A full stop is simple, but it should be obvious:

    • Your car’s wheels stop turning.
    • You pause long enough to look left, right, left (and check for pedestrians).
    • Then you move when it’s safe.

    A “rolling stop” (where the car keeps creeping) is still a not-a-stop.

    Where you’re supposed to stop

    This is the part that trips people up.

    You should stop before:

    • The stop line (thick white line), if there is one
    • The crosswalk, if there’s no stop line
    • The edge of the intersection (the place where you’d enter the cross traffic), if there’s no line or crosswalk

    If you stop too far forward, you may block the crosswalk or pull into traffic.

    What to do if you can’t see from the stop line

    Sometimes you stop correctly — and still can’t see around a parked car, bushes, a building, or a hill.

    A calm, safe method is a two-step stop:

    1. Stop fully at the correct place (line/crosswalk/edge).
    2. If you still can’t see, creep forward slowly to a better view, then stop again before entering.

    This shows you understand both the rule and the reason behind it.

    Who goes first? (a simple way to remember)

    Right-of-way rules vary a bit by state, but these basics are widely taught:

    • Pedestrians first (always).
    • At a 4-way stop, the first vehicle to stop is usually the first to go.
    • If two vehicles stop at the same time, the vehicle on the right usually goes first.
    • If you’re turning left and another car is going straight, the car going straight usually goes first.

    If it feels confusing, the best habit is: slow, make eye contact when possible, and don’t rush.

    Common misconceptions teens have

    Misconception 1: “If no one’s there, I don’t have to stop.”

    You still have to stop. The point is consistency — so everyone can predict what you’ll do.

    Misconception 2: “Stopping means putting my foot on the brake.”

    A stop means the car is not moving. If you’re still creeping, you’re still moving.

    Misconception 3: “I should stop in the crosswalk so I can see.”

    Crosswalks are for people walking. Stop before the crosswalk, then creep forward only if you need a better view.

    A quick coaching tip for parents

    Try a simple script that builds a repeatable habit:

    • “Full stop. Look left-right-left. Then go when it’s your turn.”

    It keeps the focus on process — not pressure.

    Closing

    A Stop sign is a pause point — a moment to reset, scan, and make a calm decision. When you treat every stop the same way, it becomes one of the most dependable habits you can build as a new driver.

    For more calm, visual explanations of road signs and right-of-way rules, visit mydrivebook.com.

    Share this:
  • Sunday Sign Day: Deer Crossing

    Sunday Sign Day: Deer Crossing

    Share this:

    In many areas, spring is an especially important time to take Deer Crossing signs seriously. As temperatures warm up, deer movement increases — they’re more active at dawn and dusk, may travel more after winter, and roadside greenery can make them harder to spot until they’re close.

    You don’t need to drive in a tense way. The goal is simply to give yourself a little more time and space so you can respond smoothly.

    The Deer Crossing sign is a warning sign. In plain language, it means: wildlife may enter the roadway here, so it’s smart to slow down a bit and stay alert.

    This sign isn’t a guarantee you’ll see deer — it’s just a heads-up that this stretch of road has a higher chance of wildlife crossings.

    For sign standards and examples, the national reference is the MUTCD (FHWA). Many state driver manuals also explain what to do in wildlife areas (for example, the California DMV Handbook — Special Situations: Animals).


    What the Deer Crossing sign means (and what it doesn’t)

    It means:

    • Deer (and sometimes other animals) may cross unexpectedly
    • The area may be near woods, fields, water, or known wildlife paths
    • You should give yourself more time to react

    It doesn’t mean:

    • Deer will only cross at the sign
    • It’s safe to swerve if you see an animal
    • You should stop in the roadway to look for wildlife

    A calm goal is to keep your options open: more space, a little less speed, and steady attention.


    Why this sign exists

    Wildlife collisions are common enough that higher-risk areas are marked. Deer are most active around dawn and dusk, and they often travel in groups — if you see one, there may be another close behind.

    This sign helps reduce surprise. It reminds drivers to scan the road edges and avoid sudden moves if an animal appears.

    (For broader safety context, the Insurance Institute for Highway Safety has helpful information on animal-related crashes.)


    What to do when you see it

    Here’s a simple, teen-friendly plan:

    1) Ease your speed and increase following distance
    No need to brake hard — just ease off the gas and give yourself more space to respond smoothly.

    2) Scan the edges of the road
    Deer often appear from tree lines or tall grass. Try a steady scan:

    • Far ahead (especially where headlights reach at night)
    • Road edges and shoulders
    • Just beyond the shoulder

    3) Use high beams when appropriate (at night)
    On dark roads without oncoming traffic, high beams help you see farther. Dim them when needed.

    4) If you see a deer, brake firmly and stay in your lane
    This is the most important part:

    • Brake in a straight line
    • Stay in your lane
    • Avoid swerving — it often creates a bigger risk

    If there’s time, a quick horn tap can encourage the animal to move away.


    Common misconceptions teens have

    “The sign shows where deer cross.”
    Think of it as a zone — deer can cross anywhere nearby.

    “Once one deer passes, I’m in the clear.”
    Deer often travel in groups. Keep scanning.

    “Swerving is safer than braking.”
    It can feel faster, but it’s riskier. Straight-line braking keeps you in control and predictable.


    A quick coaching tip (for parents and teen drivers)

    Try a calm callout routine:

    Parent/coach: “Deer Crossing sign — let’s add space and scan the shoulders.”
    Teen: “Easing off the gas and checking left/right edges.”

    It’s simple, but it builds a repeatable habit.


    Closing

    The Deer Crossing sign is a reminder to drive with a little extra margin — more space, steady scanning, and smooth braking if something appears.

    If you’d like a calm, visual way to learn road signs and rules (with explanations you can talk through as a family), visit mydrivebook.com.

    Share this:
  • Sunday Sign Day: Falling Rocks (What It Means and How to Drive It Calmly)

    Sunday Sign Day: Falling Rocks (What It Means and How to Drive It Calmly)

    Share this:

    The Falling Rocks sign is a warning sign you’ll usually see on roads that run alongside steep hillsides, cliffs, or mountain cuts. It’s there because rocks can end up in the roadway—sometimes after rain, melting snow, freeze-thaw cycles, or wind.

    This sign isn’t meant to scare you. It’s meant to help you adjust early so you have more time to respond if something is in your lane.

    What the Falling Rocks sign means

    The sign means: rocks may fall onto the road ahead (or may already be on the road). It’s a heads-up that the area has a known history of rockfall or debris.

    In the MUTCD (the official U.S. standard for traffic signs), this is a warning sign used where rockfall is possible: FHWA MUTCD (Warning Signs).

    Why this hazard is common in spring

    Rockfall can happen any time, but it’s often more likely when conditions loosen the ground, including:

    • Melting snow that saturates soil and cracks
    • Heavy rain that increases runoff and erosion
    • Freeze-thaw cycles that expand cracks in rock and pavement edges
    • Wind that knocks loose already-fractured material

    In other words: spring weather can change the roadside faster than you’d expect—especially on roads carved into hillsides.

    For a general overview of how weather and slope conditions can affect roadway safety, FHWA safety resources are a credible place to learn more: FHWA Highway Safety.

    What to do when you see it (simple, practical steps)

    When you see a Falling Rocks sign, you don’t need to do anything sudden. Think smooth and prepared:

    1. Scan farther ahead than usual
      Look down the road surface, not just at the car in front of you. You’re checking for small rocks, gravel, or larger debris.
    2. Keep a steady speed (and be ready to slow gently)
      If visibility is limited (curves, shadows, rain), it’s reasonable to ease off the accelerator a bit so you have more time to respond.
    3. Increase following distance
      Extra space helps if the driver ahead brakes for debris.
    4. Stay centered in your lane
      Avoid drifting toward the shoulder where rocks often collect first.
    5. Avoid stopping in the hazard zone if you can
      If traffic allows, it’s usually better to keep moving through the area rather than stopping near a slope. (If you must stop due to traffic, that’s okay—just stay alert and keep your focus ahead.)

    If you see rocks in the road

    If debris is in your lane:

    • Brake smoothly and early (no last-second slamming if you can avoid it)
    • Check mirrors before changing lanes
    • Steer around only if it’s clearly safe
    • If the debris is large or blocking the lane, consider pulling over safely after you’re past the hazard area and reporting it (many states use 911 for immediate roadway hazards; some have a non-emergency highway number)

    A calm rule of thumb for new drivers: don’t trade one risk for another. A sudden swerve into another lane can be more dangerous than slowing down and stopping safely.

    Common misconceptions teens have about this sign

    • “It’s just for mountain roads.”
      You can see Falling Rocks signs anywhere there’s a steep cut, cliff, or unstable slope—sometimes even on smaller highways.
    • “If I don’t see rocks, I can ignore it.”
      The sign is about possibility, not a guarantee. It’s a reminder to scan and stay ready.
    • “I should hug the center line to avoid the shoulder.”
      Better: stay centered in your lane. Crossing toward the center line creates new risks with oncoming traffic.

    Closing: the goal is calm awareness, not worry

    The Falling Rocks sign is a simple message: this stretch of road can change quickly. With a little extra scanning and space, you can drive it smoothly and confidently.

    If you want a calm, visual way to learn road signs and rules (and the “why” behind them), you can explore Drivebook at https://mydrivebook.com.

    Sources:
    FHWA MUTCD – Part 2C (Warning Signs and Object Markers) (covers warning sign standards; relevant section for the Falling Rocks warning sign)
    https://mutcd.fhwa.dot.gov/htm/2009/part2/part2c.htm

    FHWA – Highway Safety (general roadway safety guidance and context)
    https://highways.dot.gov/safety

    Share this:
  • Night Driving Basics: What New Drivers Should Know Before the Sun Goes Down

    Night Driving Basics: What New Drivers Should Know Before the Sun Goes Down

    Share this:

    Driving after dark is a different experience than driving in daylight — and that’s not a reason to worry, it’s a reason to prepare. Reduced visibility, headlight glare, and fatigue all play a role in making nighttime driving more demanding. Understanding what changes after dark helps new drivers approach it with awareness and confidence.


    1. Your Vision Works Differently at Night

    During the day, your eyes adjust quickly and take in a wide field of information. At night, that changes. Depth perception becomes harder to judge, peripheral vision narrows, and color recognition is reduced. Headlights on a standard vehicle illuminate roughly 250 feet ahead — which sounds like a lot, but at highway speeds, that’s only a few seconds of reaction time.

    The key takeaway: slow down slightly and give yourself more space to react. You don’t need to be nervous — you just need to be deliberate.


    2. Use Your Headlights Correctly

    Turn your headlights on at dusk — not just when it’s fully dark. Many states require headlights to be on from 30 minutes after sunset to 30 minutes before sunrise, but turning them on earlier than required is always a good habit. It helps other drivers see you just as much as it helps you see the road.

    Use high beams on unlit rural roads when no other vehicles are nearby. Switch back to low beams when you see an oncoming car or are following another vehicle closely. High beams aimed directly at another driver’s mirrors or eyes can cause temporary glare and make driving harder for everyone.

    Bright headlights from oncoming traffic can feel especially intense on two-lane roads or when the road is wet, because light reflects more aggressively off the pavement.


    3. Manage Glare from Oncoming Headlights

    Bright headlights from oncoming traffic can temporarily reduce your ability to see the road ahead. Instead of looking directly at the lights, shift your gaze slightly to the right edge of your lane. This helps you stay oriented without being blinded by the glare.

    If your windshield has smudges or streaks, they scatter light and make glare significantly worse. Keeping the inside of your windshield clean is a simple habit that makes a real difference at night.


    4. Watch for Pedestrians and Cyclists

    Pedestrians and cyclists are much harder to see at night, especially if they are not wearing reflective clothing or using lights. Intersections, crosswalks, and areas near parks or schools deserve extra attention after dark. Slow down when approaching crosswalks and scan both sides of the road, not just directly ahead.

    This is especially important in residential areas where people may be walking dogs, jogging, or returning home in the evening.

    In rural areas, wildlife can become just as important to watch for as pedestrians — especially deer near tree lines and open roadside fields.


    5. Recognize the Signs of Fatigue

    Fatigue and nighttime driving are a common combination — and a dangerous one. Drowsiness slows reaction time in ways that are easy to underestimate. If you notice your eyes feeling heavy, your mind wandering, or yourself drifting in your lane, those are clear signals to stop and rest.

    New drivers should avoid long nighttime drives when tired, especially late at night or in the early morning hours. If you are on a longer trip, plan rest stops in advance and do not push through fatigue.


    6. Build Familiarity Gradually

    If nighttime driving feels unfamiliar, that is completely normal. Start with short, familiar routes in low-traffic conditions. Driving a route you already know in daylight — but at night — helps you focus on adjusting to the lighting and visibility changes without also navigating an unfamiliar area.

    As your comfort grows, you can gradually expand to busier roads, highways, and less familiar routes. There is no rush. Building confidence in stages is a sound approach.


    Night driving is a skill that develops with practice and awareness. Understanding how visibility changes, how to use your headlights properly, and how to manage glare and fatigue gives new drivers a solid foundation before they ever leave the driveway after dark.

    The goal is not to rush into night driving — it’s to let your eyes, judgment, and habits adjust until darkness feels normal too.


    Share this:
  • What New Drivers Should Know About Roundabouts

    What New Drivers Should Know About Roundabouts

    Share this:
    Aerial view of a U.S. roundabout showing cars entering and yielding

    Roundabouts are showing up on more roads across the US, and they tend to catch drivers off guard — new and experienced alike. Even some seasoned drivers who never had a clear explanation of how roundabouts work can find themselves hesitating at the entry point. Once you understand how they work and why, they are actually one of the more straightforward intersections you will encounter.


    What a Roundabout Actually Is

    A roundabout is a circular intersection where traffic flows in one direction — counterclockwise — around a central island. Instead of stopping at a red light, drivers slow down, yield to traffic already in the circle, and then merge in when there is a safe gap.

    That is the core idea: yield before entering, then keep moving once you are inside.


    Why Roundabouts Exist

    Roundabouts are not just a design trend. According to the Federal Highway Administration (FHWA), roundabouts are a proven safety countermeasure that can substantially reduce crashes resulting in serious injury or death. The reason is simple: there are no high-speed, head-on or right-angle collisions. Traffic moves slowly and in the same direction.

    Understanding why a rule or road feature exists helps you use it correctly. Roundabouts are built for safety and flow — not to confuse you.


    The One Rule That Matters Most: Yield Before You Enter

    When you approach a roundabout, you will see a yield sign. That sign means: traffic already inside the roundabout has the right of way. You wait for a safe gap, then you enter.

    You do not stop inside the roundabout. You do not stop once you have entered and traffic is moving. You only pause at the entry point, and only if needed.

    This is the most common source of confusion — new drivers sometimes stop inside the circle or try to force their way in. Neither is correct.


    How to Choose Your Lane (Multi-Lane Roundabouts)

    Single-lane roundabouts are straightforward. Multi-lane roundabouts require a bit more planning.

    A general guide:

    • Taking the first exit (turning right): Use the right lane.
    • Going straight through: Either lane is typically acceptable, but check posted lane signs.
    • Taking a later exit (turning left or going around): Use the left lane.

    The key is to decide your lane before you enter. Changing lanes inside a roundabout is not safe and is not permitted. Look for lane-use signs as you approach — they will show you which lane leads to which exit.


    Signaling in a Roundabout

    Signaling is simple once you know the pattern:

    • Entering: You generally do not need to signal when entering.
    • Exiting: Signal right as you approach your exit. This lets other drivers and pedestrians know you are about to leave the roundabout.

    Some drivers skip this step, but using your signal when exiting is a good habit and is expected on a permit test.


    Pedestrians and Cyclists at Roundabouts

    Roundabouts have crosswalks, and pedestrians have the right of way at those crosswalks — just as they do at any intersection. Before you enter the roundabout and again as you exit, check for people crossing.

    Cyclists may ride through the roundabout in the travel lane, or they may use a separate path alongside the road. Either way, give them space and do not rush around them.


    Common Mistakes to Watch Out For

    Knowing what tends to go wrong is just as useful as knowing what to do right. These are the errors that come up most often at roundabouts — and being aware of them puts you a step ahead.

    • Stopping inside the roundabout. Once you have entered and traffic is flowing, keep moving. Stopping unexpectedly inside the circle confuses other drivers and disrupts the flow the roundabout is designed to maintain.
    • Entering without yielding. Some drivers pull in without checking for traffic already circling. The yield sign at the entry is not optional — vehicles inside always have the right of way.
    • Forgetting to signal when exiting. It is easy to focus on navigating the circle and skip the exit signal entirely. That signal matters — it tells the driver behind you and any pedestrians at the crosswalk what you are about to do.
    • Choosing the wrong lane too late. In a multi-lane roundabout, trying to sort out your lane after you have already entered creates a real problem. Lane changes inside the roundabout are not permitted. Make the decision before you arrive.
    • Going too fast on approach. Roundabouts require you to slow down and read the situation — traffic inside, pedestrians at crosswalks, lane signs. Entering at speed leaves you no time to do any of that well.
    • Overlooking pedestrians at the exit. Drivers often check for pedestrians when entering but forget to check again when exiting. Crosswalks exist at both points, and pedestrians have the right of way at both.

    Most of these mistakes come down to the same thing: moving faster than your awareness can keep up with. Slowing down on approach gives you the time to get everything right.


    A Quick Summary Before You Encounter One

    Here is what to keep in mind the next time you see a roundabout ahead:

    1. Slow down as you approach.
    1. Yield to traffic already inside the circle.
    1. Choose your lane before entering.
    1. Keep moving once you are in — do not stop.
    1. Signal right when you are ready to exit.
    1. Watch for pedestrians at crosswalks — entering and exiting.

    Roundabouts feel unfamiliar at first, but they follow a clear and consistent logic. Once you have driven through a few, the pattern becomes second nature.


    Roundabouts are a good example of a road feature that seems tricky until you understand the reasoning behind it. The rules are not arbitrary — they are designed to keep everyone moving safely. That same principle applies to most of the rules you will study for your permit test: when you understand the why, the what becomes much easier to remember.


    New to roundabouts? This guide explains how they work, who has the right of way, common mistakes to avoid, and what to expect — in plain, clear language for new drivers.


    Sources


    Share this: